The starter relay is installed.
Thursday, February 16, 2012
Wednesday, February 15, 2012
The right side is done.
The left side was dry and rusted.
Cleaned up the surfaces with a 1000 grid sand paper.
The races are in place. Used a little heat on the housing to make the job easier.
There was rust were the axle and rotor meet.
The bearing is bigger than the seal. One way would be to install the bearing and the seal then bang the axle in the bearing. I prefer to install the seal on the axle then the bearing. Once it's in place I can make sure that the seal is seated right and not pushed in. The rotor has to be off in order to see the seal. So, I put the shield and the rotor first then install the axle. In order to connect the rotor to the axle, I have drilled a hole on the shield to install the 5 bolts one by one.
The axle ready to go.
Tuesday, February 14, 2012
Rear wheel bearings...
The job started with a seized connector.
Not a fun job and it is tough to remove the axle assembly. I've quickly made a tool to go behind the suspension arm to have something for my extractor to grab on; The tool rests behind the "ears" where the disk protection plate is attached to.
Worked!
Removing the bearing races inside is not easy; here it is after cleaning.
The bearing race on the shaft is a challenge to remove. I've use a torch to expend it.
Sunday, September 25, 2011
Clutch and rust proofing...
The clutch is now free; just went under the car with a screw driver.
I have done a rust proofing on this car. After years of taking pictures and doing rust proof on cars I have finally put a document together. This will help for future jobs.
 |
| http://philcaron.com/docs/SM_rust_proofing.pdf |
Saturday, September 24, 2011
Clutch slave cylinder.
Found some oil on the floor...
I thought that it was from the gearbox, but after looking up I saw that it was coming from the slave cylinder.
The leak tube was too short and ending right next to the brake rotor.
The piston came out by itself; the O ring was hard and worn. I've polished the piston and change the O ring for the bleed screw (Same O ring than a plate connector). I've straightened the tube with a heat gun; now it ends below the cross member.
I had an issue with the return hose from the regulator; it was rubbing against the fans of the alternator pulley. Changed the hose and rerouted it.
I thought the car was finished but the clutch is stuck. We will deal with this today.
Wednesday, September 21, 2011
Console: Finished.
The console is finished; the hand brake, shifter and electrical are hooked up. The seat is also back on and she is drivable. I have to bleed the front brakes before delivery.
Next: Rustproofing.
Tuesday, September 20, 2011
Exhaust finished, front suspension cylinder and interior...
The right side of the muffler was not supported.
Once I've started the engine, I've got rid of the exhaust leaks.
A lot of water came out from the exhaust.
About to start the front suspension cylinder; safety first...
I've changed the Oring in the cylinder as well as the ball and the boot.
The hydraulic fluid filter was extremely dirty and the LHM is yellow.
The new hose is in place.
Time to start the engine... (Ignition switch failed after a few tries)
I removed most of the old glue and use Prep All for adhesion.
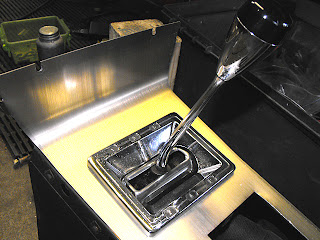
The console and the different stainless steel and chrome parts are cleaned and polished; ready to go in.
Subscribe to:
Posts (Atom)


